Sporterizing howto

Sporterized and unofficial modified Krags
FredC
Posts: 1992
Joined: Fri May 31, 2013 4:38 pm
Location: Dewees Texas

Sporterizing howto

Post by FredC »

I have no skills as a wood worker or stock maker but have been a machinist for many years. I am trying to attach some photos of a machine set up that others with similar skills might be able to use. If there is an interest in this and posting this stuff is not stepping on toes, I will post more on this project.
The setup shown is making an accurate hole through the stock for a large pillar that does double duty as a sight mount. This same set up could be used for a small plain pillar to hold down the front of the action when no barrel bands are used on a custom stock. If the photos are really there I will give a description of why and how in the next post.
ImageImage

FredC
Posts: 1992
Joined: Fri May 31, 2013 4:38 pm
Location: Dewees Texas

Re: Sporterizing how to

Post by FredC »

As an explanation of the photos, I needed to make a neat hole through the stock at just the right location was unsure how to do it with hand tools.The set up started by toe clamping an aluminum block in the back, it was indicated in parallel to the table. Its purpose was to be something to line up the V-blocks that would support the Krag action. This was the key to lining up the action. With the receiver on the V-blocks I indicated across the top to level it out then toe clamped it. The toe clamp did a little damage in the area near the ejector, if there ever would be a next time I would place an 1/8 metal shim under the clamp. The top photo shows an aluminum stub in place of the barrel. I used this to find the center of where the new barrel would be, then using the edge finder shown found the end of the receiver which would be the starting point of the slot to be milled in the stock. After setting zero in both X and Y, I screwed the blank out and hand tightened the original barrel, installed the stock and trigger guard and toe clamped the stock on top with moderate tightness. The fore end of the stock was shimmed with card board in the regular mill vice to keep it from chattering while milling the stock. This procedure could be used to put one neat hole in the stock for a conventional pillar, which really is needed in a US Krag if barrel bands are not used. Pictures of European Krags on this web site show a forward hold down screw so a pillar would not be needed on them. The attached photos show the finished slot and the sight base that the pillar would support along with the old barrel. If this seems like a strange thing to do to a Krag, the purpose of this rifle is for shooting wild hogs in low light. Again the info might be helpful to a Kragsmith or anyone else wanting to do a nice sporter.[img]https://kragcollectorsassociation.org/k ... HoleRS.jpg[/img][img]https://kragcollectorsassociation.org/k ... rag1rs.jpg[/img]
Last edited by FredC on Mon Jun 05, 2023 3:00 pm, edited 1 time in total.

FredC
Posts: 1992
Joined: Fri May 31, 2013 4:38 pm
Location: Dewees Texas

Re: Sporterizing howto

Post by FredC »

After getting that hole for the front pillar done, I was ready to put this together and start shooting. Then Bubba raised his ugly head. A little background, this gun came from my uncle. He only had girls and my brother was not interested so I inherited it. This gun was leaned up against a truck and someone drove off breaking the original stock. My aunt said a friend carved the replacement out of cherry wood. Not sure if that meant if it was whittled from a block of wood or a purchased blank was finished and fitted.Any way I noticed the guard screws did not line up and a taper was ground on each to allow them to start. The screws were only catching a couple of threads. It is a wonder the barreled action did not jump out of the stock. Later noticed the trigger guard was pounded flat. A good replacement (thanks Dan) shows the 2 ends are supposed to have a 5 degree included angle between the ends (see photo, the guard is sitting on a ground parallel).If you do not put the screws into the receiver when it is apart you will not see the unusual angles involved. The forward screw is at a right angle to the barrel and bolt channel. The bottom of the receiver is at about a 4.5 degree angle because of the rimmed cartridges so it looks like the screw is at a angle. The rear screw is at a 5 degree angle to the bolt (see photo). I liked this stock because it fit my hands pretty well and pointed naturally even though it is not traditional. I can only work a couple of hours a week on this so it took a long time to straighten out. I spent days trying to get the barreled action rotated to line up with the trigger guard and worrying out the holes in the guard. Eventually I gave up and bored the holes out in the stock for pillars on the guard screws also. The screw blank in the photo served as a pilot for a custom 9/16 cutter driven by a hand drill. So for anyone fitting a new stock, know the location of the cutout and distance to the guard is critical.

[img]https://kragcollectorsassociation.org/k ... ews1rs.jpg[/img]
Last edited by FredC on Mon Jun 05, 2023 3:00 pm, edited 1 time in total.

FredC
Posts: 1992
Joined: Fri May 31, 2013 4:38 pm
Location: Dewees Texas

Re: Sporterizing how to: Screws

Post by FredC »

After noticing the original screws were ruined I made new ones. For anyone new to Krags they were built before the USA unified screw system was developed. The 2 original are on the left, the middle 2 are the replacements and the 2 on the right are for the front pillar.
The guard screws are 1/4 in diameter, but with an unusual pitch and thread form. The pitch is 25 compared with 20 and 28 for unc and unf of the unified system. The best I could tell is the Krag screws do have 60 degrees on the flanks as modern unified screws have. I did check the angles on an optical comparator but they were not exact and also worn.
The thread form has unusually large radius at the root and crest of the threads. One could use a standard threading tool and the extra material removed from the roots will have no effect on the fit of a new screw. Making the root radius larger than the standard unified threads will make the screw slightly stronger and make it look to be more original. The peak of a Krag replacement screw has to be filed or machined to near or nearly the correct radius otherwise the screw will bind on the radius or have to be machined so deep the screw will be weakened (see photo).
I made the screws in the photo out of W1 tool steel as it is relatively easy to machine and heat treat. If I did not have an oven or the ability to heat treat I would use Fatigue Proof as it is fairly easy to machine and already heat treated.
I made the 2 guard screws larger than the original on the pitch diameter (checked with wires) and they are still loose because of the tapered threads in the receiver.
At the armory they probably made their own taps and made them oversize to start with as they wore down mostly on the ends and would start to cut a severe taper, so the threads in any one receiver could be slightly oversize and the same size from top to bottom or tapered depending on wear of the tap. Our modern high speed steels (wear resistant) were a gleam in some ones eyes back then.ImageImage

FredC
Posts: 1992
Joined: Fri May 31, 2013 4:38 pm
Location: Dewees Texas

Re: Sporterizing how to Barrel tools

Post by FredC »

I have attached a photo of the tools I used to do the barrel work on my sporter. The thinner two piece of aluminum clamp (on the left) was used on the action. A small 1/8 pin is protruding from the face, it was up against the action to insure the clamp did not slip and it was plenty strong as my barrel was not super tight. This clamp was original split on one side only and the 3/8 Allen screw provided adequate tightening force. I had to split it into 2 pieces to get it inside the sight mount when the new barrel was installed and the extra screw was added then. The Crescent "auto" wrench used to provide torque. This wrench say on the side no extensions or hammering and it was fine with no "cheaters".
The larger clamp in the middle has 5/16 screws on the same side. It for the barrel and was held in the vice on the milling machine. With the 2 screws and the additional force from the vice it did not slip at all and I am fairly certain that anyone else could use the same set up and not damage a Krag barrel. This is assuming that mine was representative of all others.
I did bore this clamp out to tighten the nut that holds the sight base on my rifle, then split round bushing (right) was used to go back and hold the barrel. I am getting old and I do not remember why now.
If anyone is wondering about the custom trigger in the early photos. It was made 40 years ago when I was working in a screw machine shop and the only manual machines available were a drill press and surface grinder. I modified the cam surfaces so the gun fires immediately after the first stage slack is taken out. This was made for my other all original Krag after I broke the trigger in it. The trigger from this rifle was swapped to restore the all original Krag. If anyone else removes a trigger from your Krag, ask about which side to push the tapered pin out so you do not break the trigger like I did. There are a lot of knowledgeable people that hang out here and they like to help.
Image

User avatar
butlersrangers
Posts: 9892
Joined: Wed Oct 07, 2009 11:35 pm
Location: Below the Bridge, Michigan

Re: Sporterizing howto

Post by butlersrangers »

FredC - Your commentary on Springfield Armory threads and Dies is interesting. I assume our U.S. Armories and tooling were influenced by the 'French Arms' we first copied and manufactured.

FredC
Posts: 1992
Joined: Fri May 31, 2013 4:38 pm
Location: Dewees Texas

Re: Sporterizing howto

Post by FredC »

FredC - Your commentary on Springfield Armory threads and Dies is interesting. I assume our U.S. Armories and tooling were influenced by the 'French Arms' we first copied and manufactured.

It could be French, I would have guessed English as the 1917 Enfield has a similar thread to the Krag. I had mine (Enfield) apart so long the screws got lost and I had to make a pair for it. It seems they had the same thread form, without pulling one apart though I can not remember for sure. The Brits also had a Whitworth thread form that had rounded roots and crests but it had 55 degree flanks. If you look at the Krag screw on the optical comparator, they sure look like 60 degree but they have been "pulled" a little.
Not being an expert on the history it could be the Americans copied the French, then the Brits copied one or the other for original P14.

Right now it is just something to be aware of to make a good fitting replacement.

Interestingly the US, French and English governments did work together to establish the Meter. A French tool maker/scientist made the three original meter rods and one was give to each government. Our inch is now base on 2.54cm and the original meter rods replaced as they were not done that well anyway.

FredC
Posts: 1992
Joined: Fri May 31, 2013 4:38 pm
Location: Dewees Texas

Re: Sporterizing howto

Post by FredC »

FredC - Your commentary on Springfield Armory threads and Dies is interesting. I assume our U.S. Armories and tooling were influenced by the 'French Arms' we first copied and manufactured.

I just pulled the original screws out of my dad's 1917 Enfield and they have 30 threads per inch with the same rounded crests and roots. The flanks have the now standard 60 included angles and not the earlier 55 Witworth angles.
So you may very well be correct that the 25 TPI is French. I got mixed up because the Brownells catalog makes reference to one other rifle having the same pitch as the Krag, must have been the 03 Springfield.
It is funny that the French and English gun makers would have used such odd ball thread pitches. Most small and medium size lathes have an 8 pitch lead screw. If the thread TPI that you are cutting will divide into 8 evenly you do not need to look at a thread leadscrew dial as you can start the feed at any place. The 24 AND 32 pitch screws of the American unified system would have faster to make before screw machines became readily available.

FredC
Posts: 1992
Joined: Fri May 31, 2013 4:38 pm
Location: Dewees Texas

Re: Sporterizing how to - Mill Fixture for stock work

Post by FredC »

The angle iron in the front is made from commercial 3/4 x 4 angle iron that I bought from a oil field machine shop where I worked. After squaring it up in the mill 2 oversize 5/16 holes were drilled on 4 inch centers for holding the V blocks to the angle. The distance to the front edge was 1/2 the thickness of the V blocks so they could be lined up against the fence on the front (top in the accompanying photo). The fence is a commercial hardened and ground parallel, the spacing of its mounting holes was also 4". The V blocks are made by Eron and I think they can still be purchased from industrial suppliers.
In use and also when finishing the angle iron a piece of 2 inch long brass bar stock was used between the front vice jaw in the mill and the leg being held in the vice. This insures that the angle iron is flat against the rear vice jaw.
The round bar on top is 16mm (.6299 inches) stainless that I had on hand 5/8 inch bar will do as the Krag bolt is approx. 5/8. This bar is 5 1/2 inches long and worked well with 4" inch hole spacing (3/4" from one end).
To set this fixture up set one leg in the mill vice with an appropriate spacer between the bottom leg and front vice jaw. Install the front fence to line up the V blocks, set the barreled action in the V blocks. After getting the hold down studs started in the bolt blank you can indicate the bottom of the action level then tighten the nuts under the angle iron. After all this is done the stock can be attached to the barreled action and milling angles can be done to the stock.
The second photo shows the fixture from the back of the machine after the front pillar and front trigger guard cuts were made. The 5 degree angle is for the last cut on the rear trigger screw (5 degrees from level).
That angle iron in the rear of the first photo, I found it in a tool box when I was putting the new one away. The hole spacing in it, you might have guessed, 4 inches. That is trouble with getting old, you forget stuff!ImageImage

FredC
Posts: 1992
Joined: Fri May 31, 2013 4:38 pm
Location: Dewees Texas

Re: Sporterizing how to - Mill set up #2

Post by FredC »

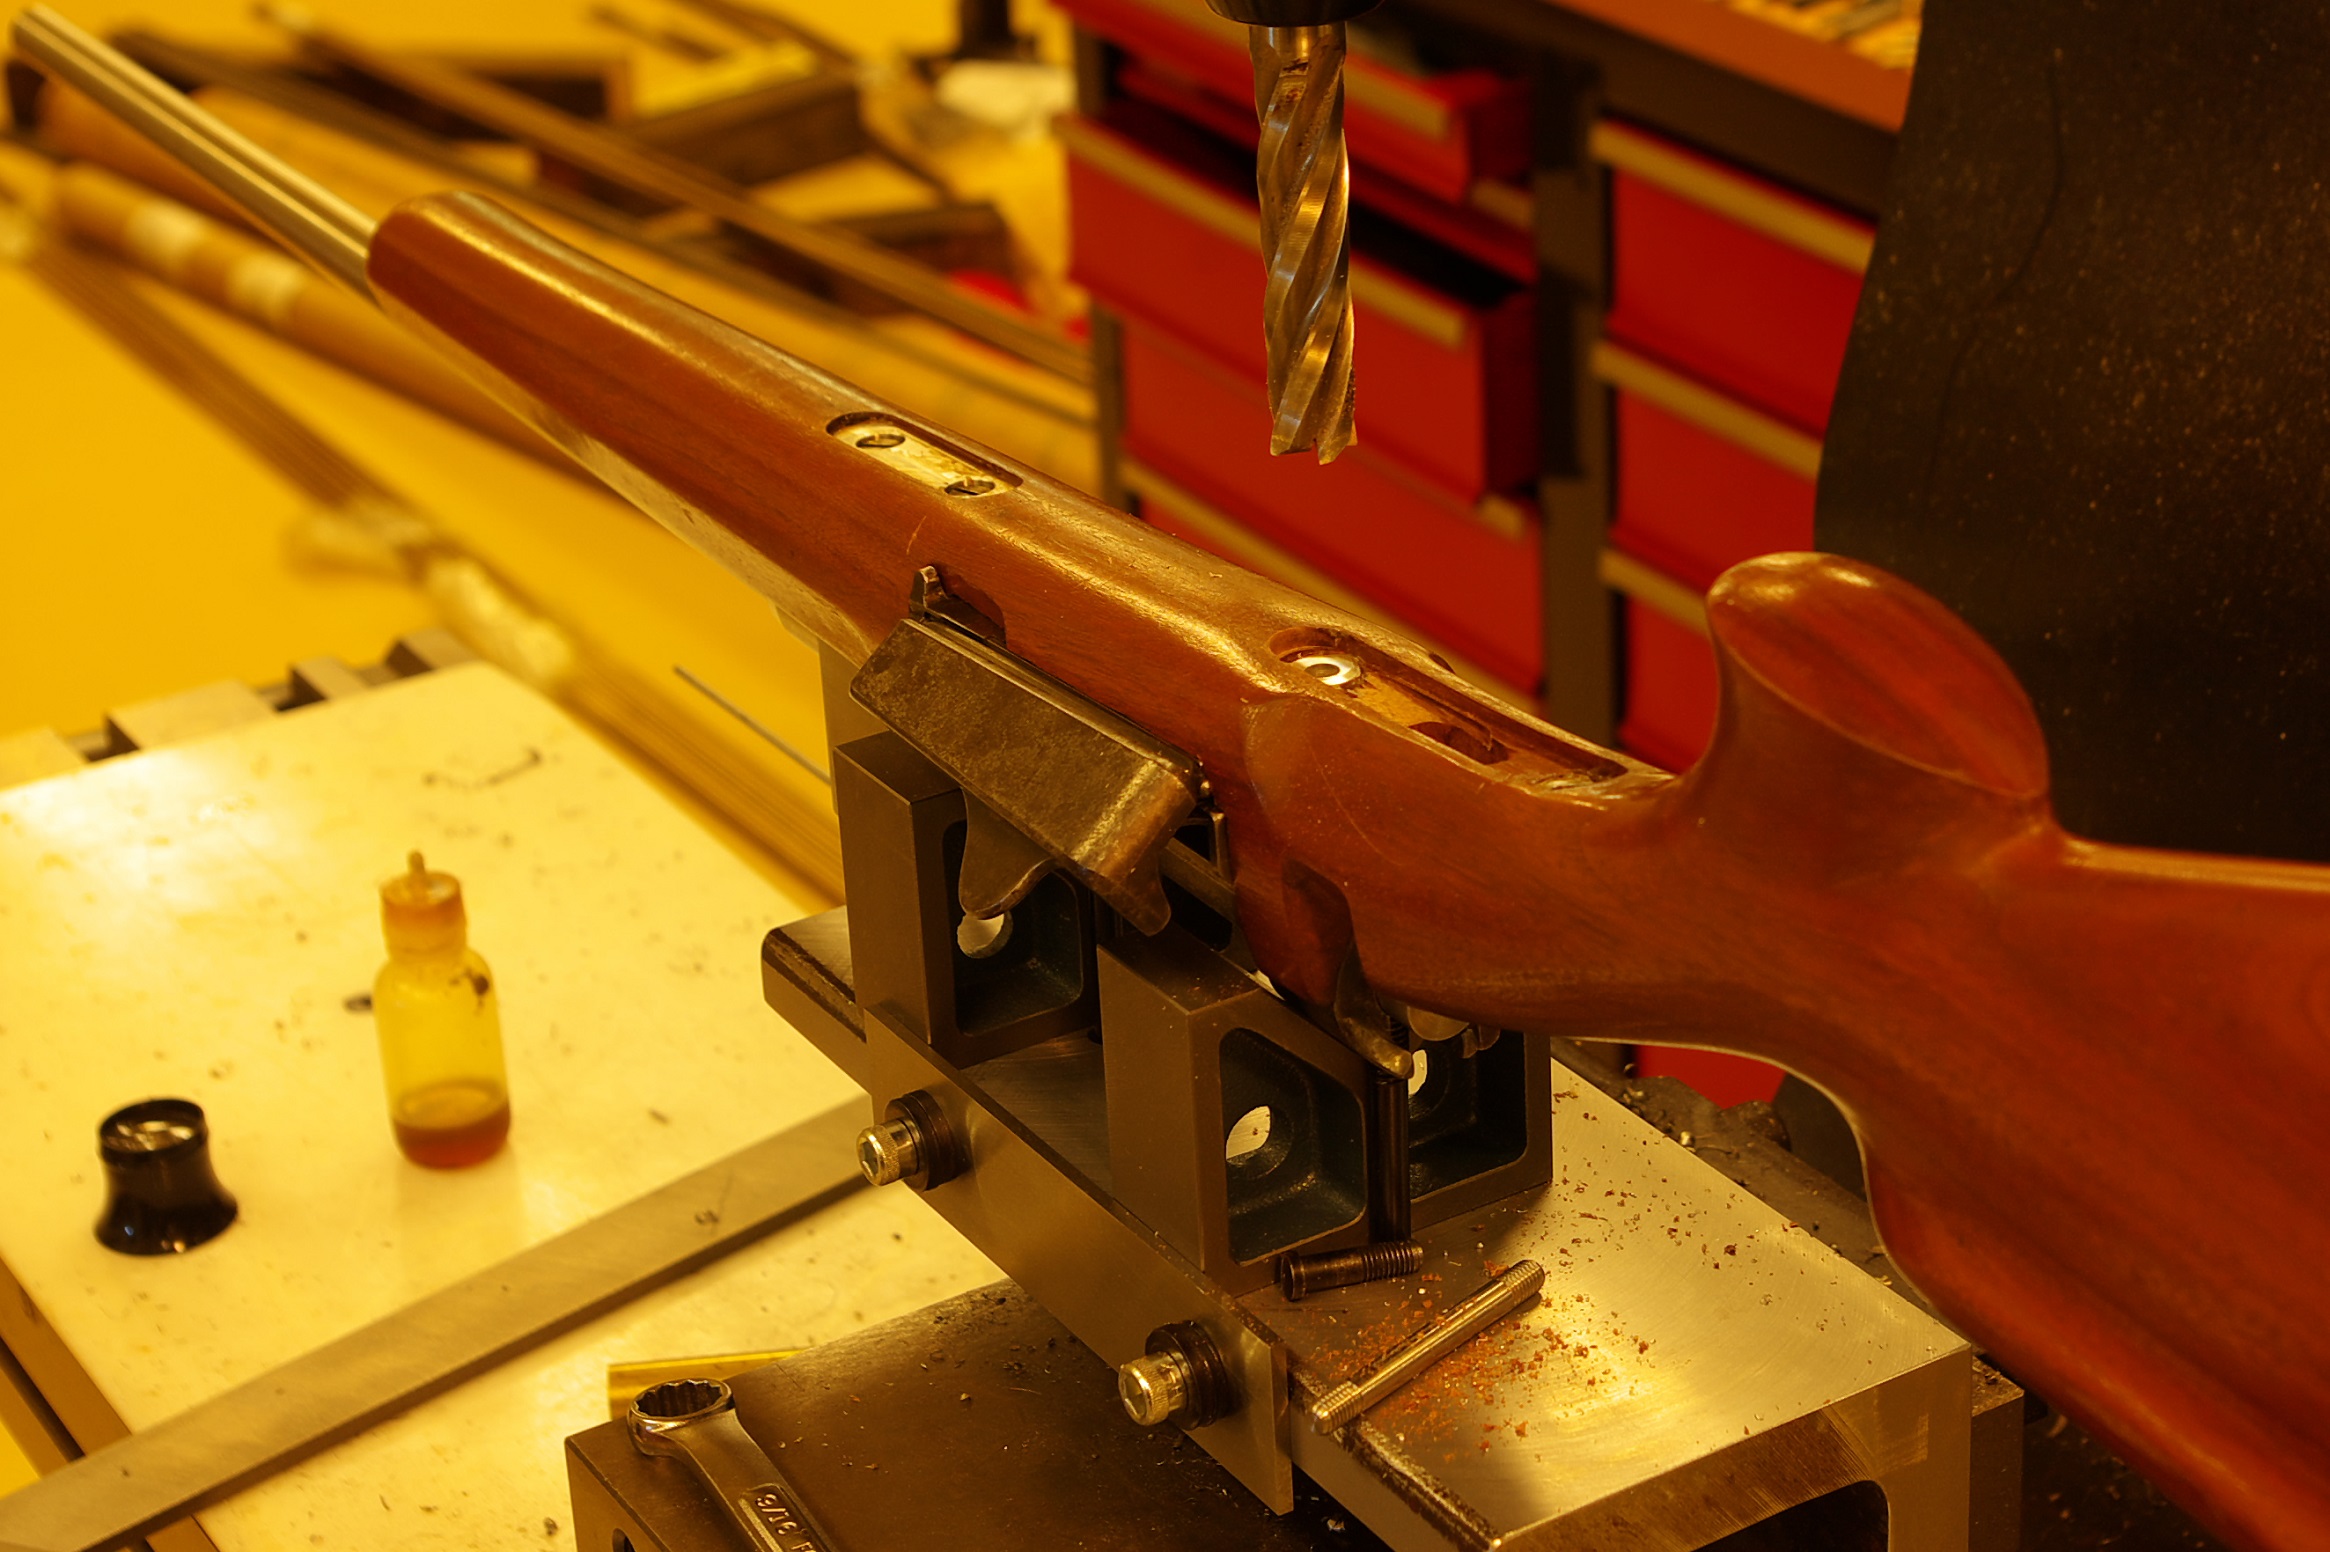
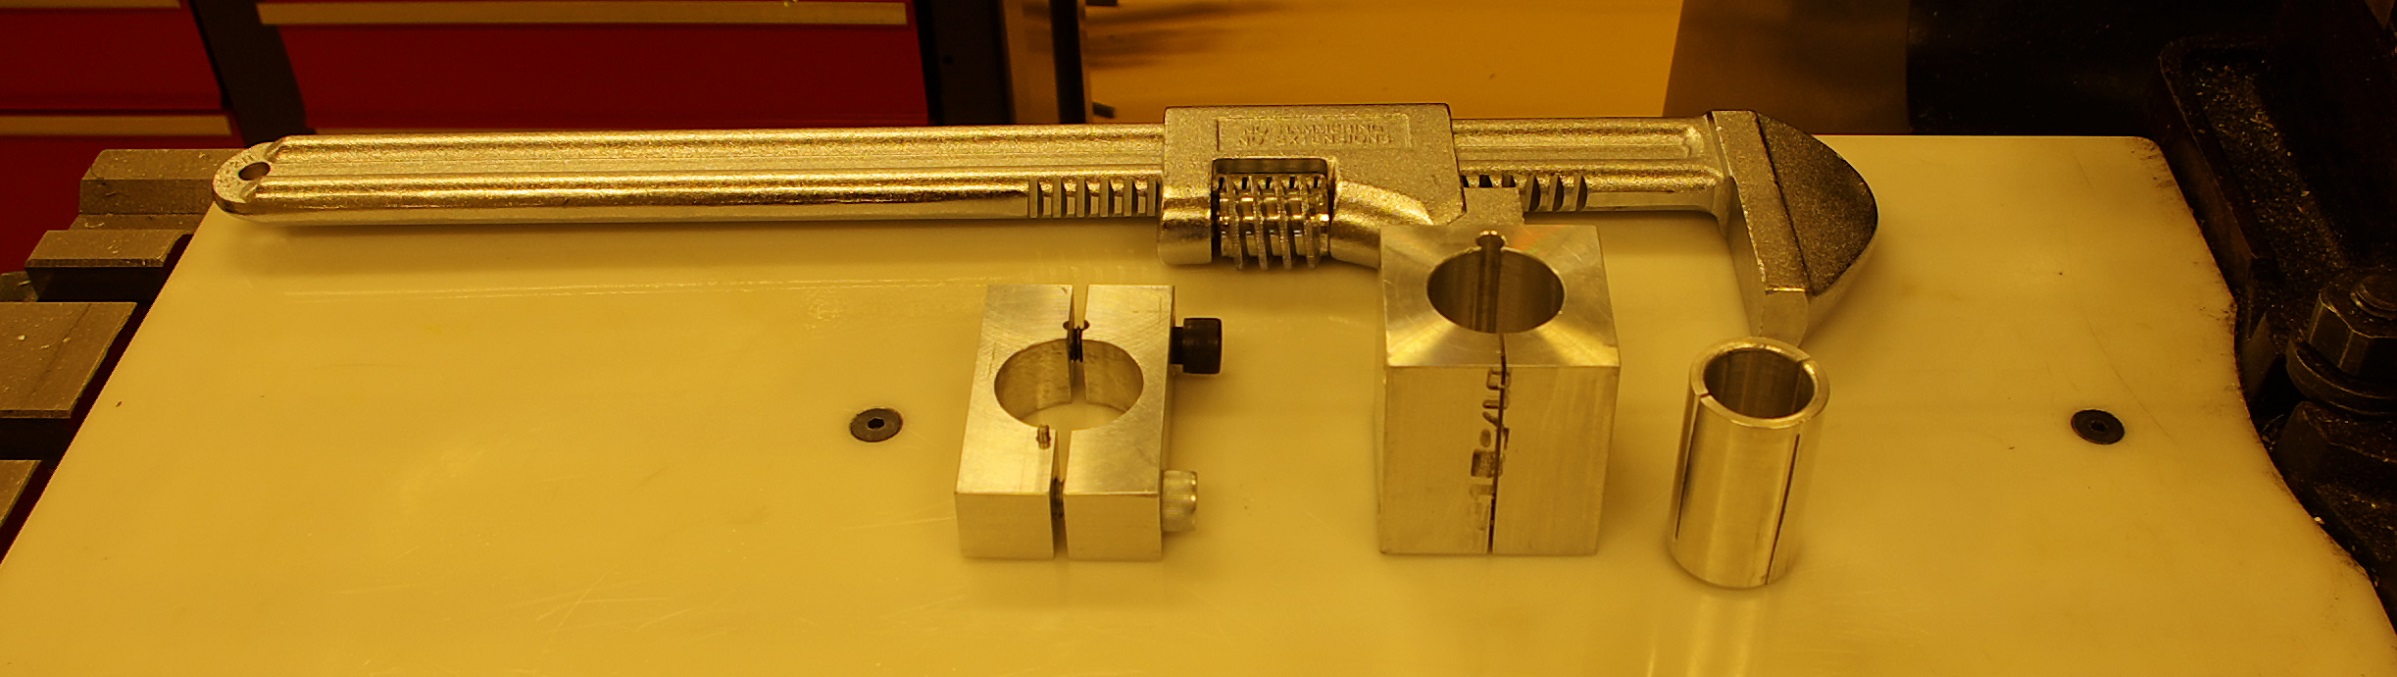
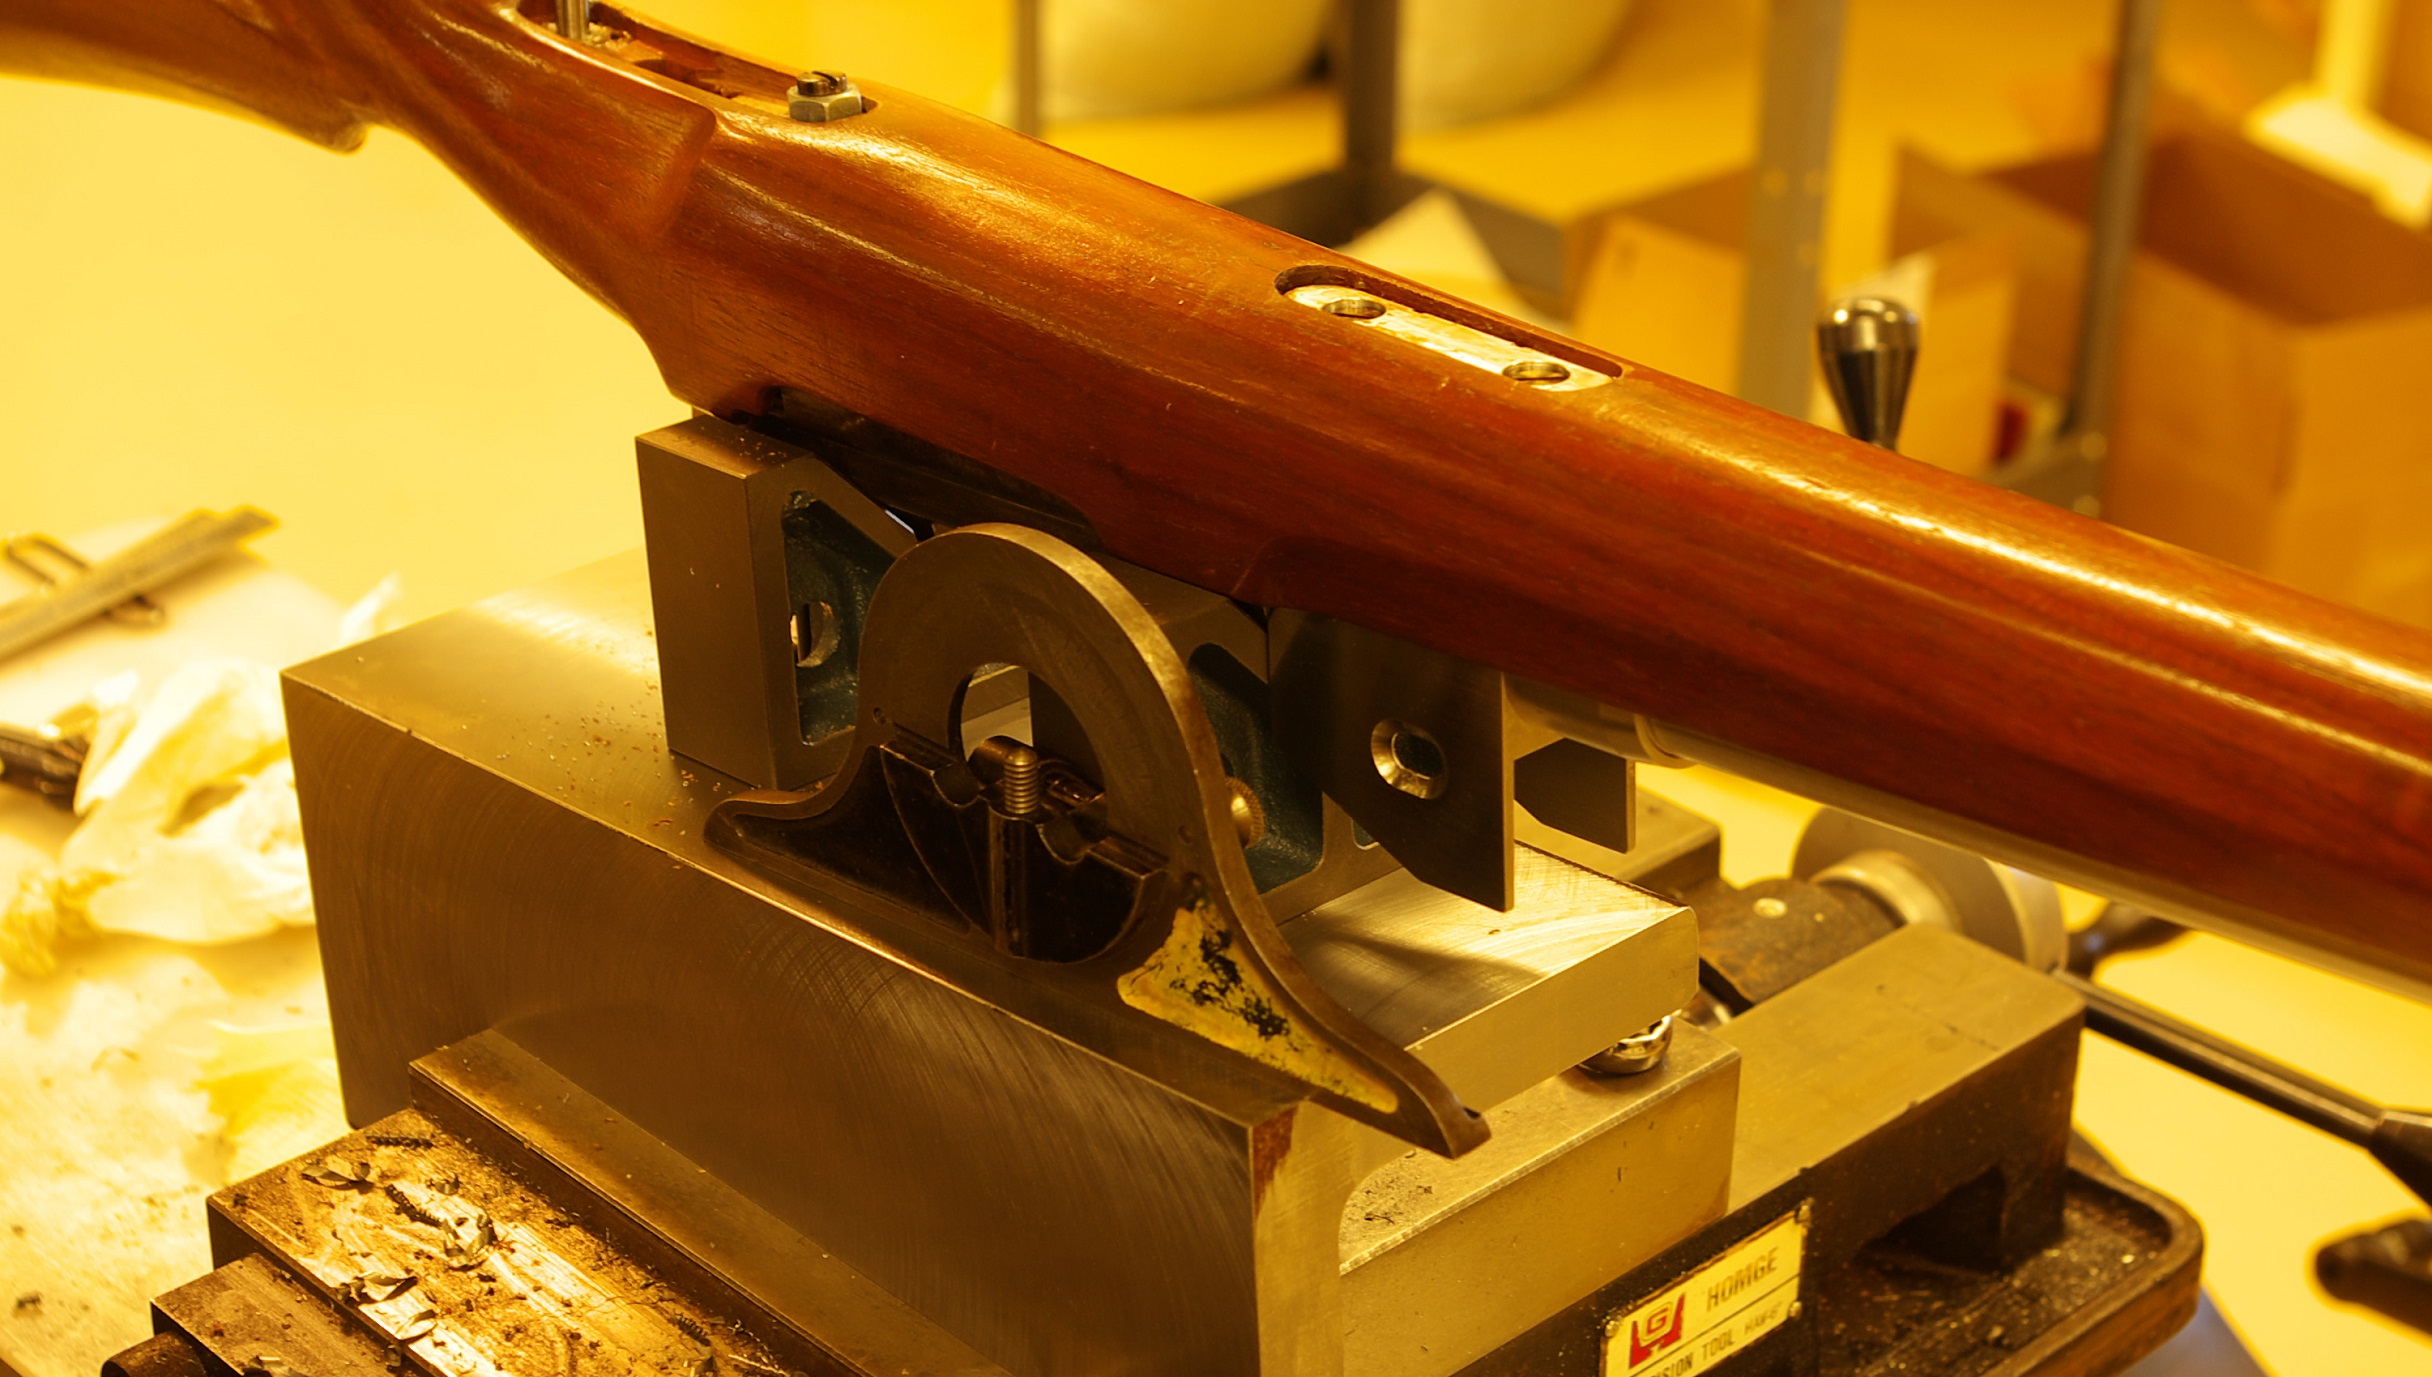
This is the last planned installment of this thread. The first photo shows the fixture still level after milling the front guard screw area. This got the cut out centered to the action and wide enough for the new guard as well as finishing the new pillar to the correct height.
After that but not pictured, I indicated the stock level near the front sight pillar and milled the pillar flat and cleaned up the epoxy that got in this area (A brass cover is planned for this recess).
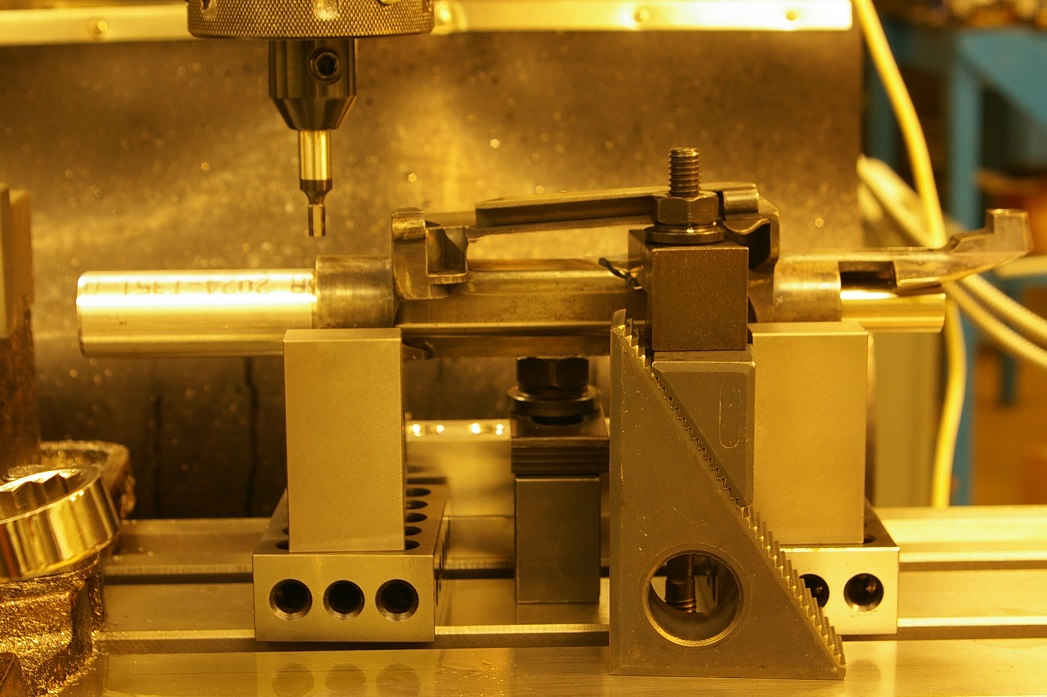
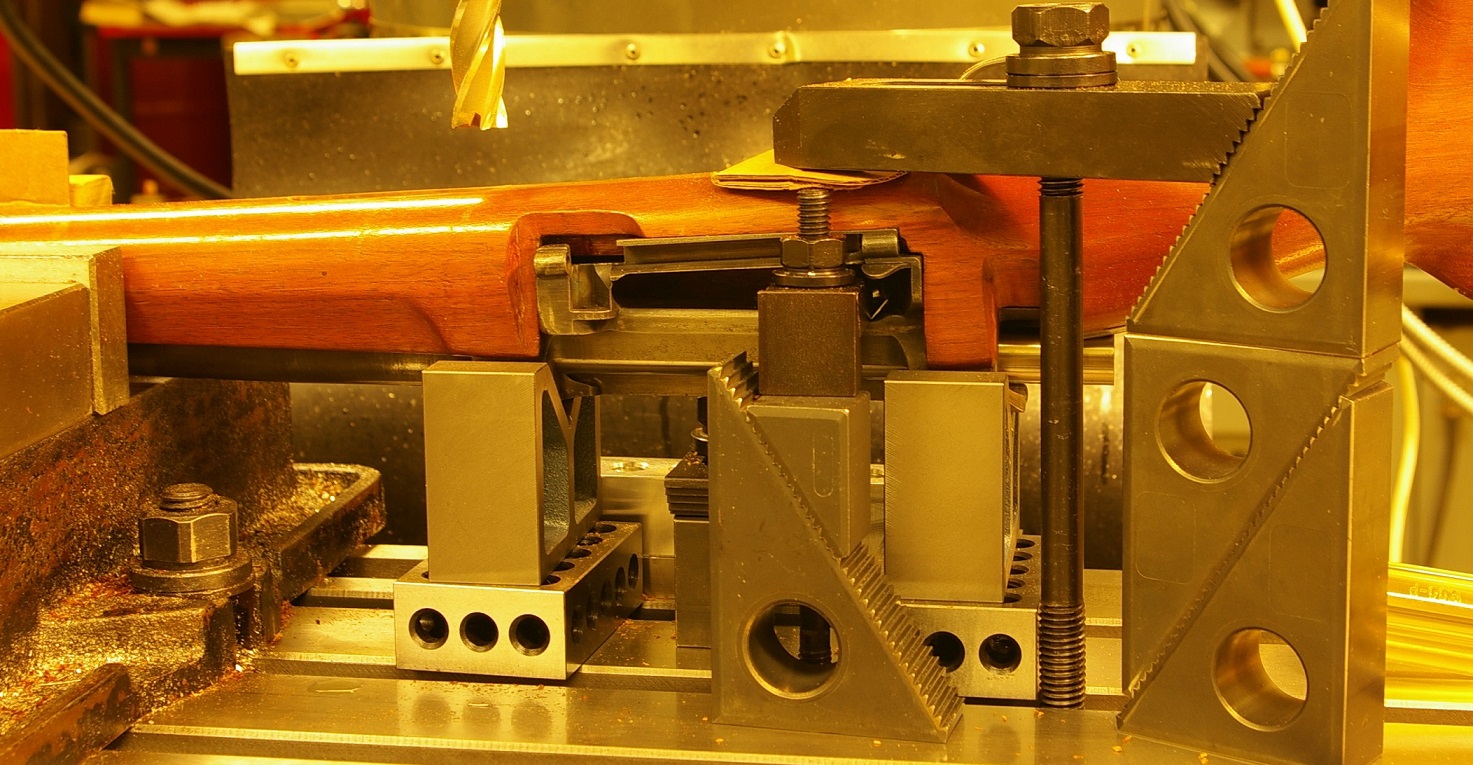
The last photo shows indicating a gauge pin in to find the center line of that screw and finish dialing in the 5 degree angle. That cut was made till the guard was appropriately deep and the pillar cleaned up.
In other threads it has been mentioned that some after market stocks are very hard to get fitted. This last fixture could go a long way in making the trigger guard match the receiver. I would not recommend going the trigger guard pillar route unless you are cleaning up someone else's mess.
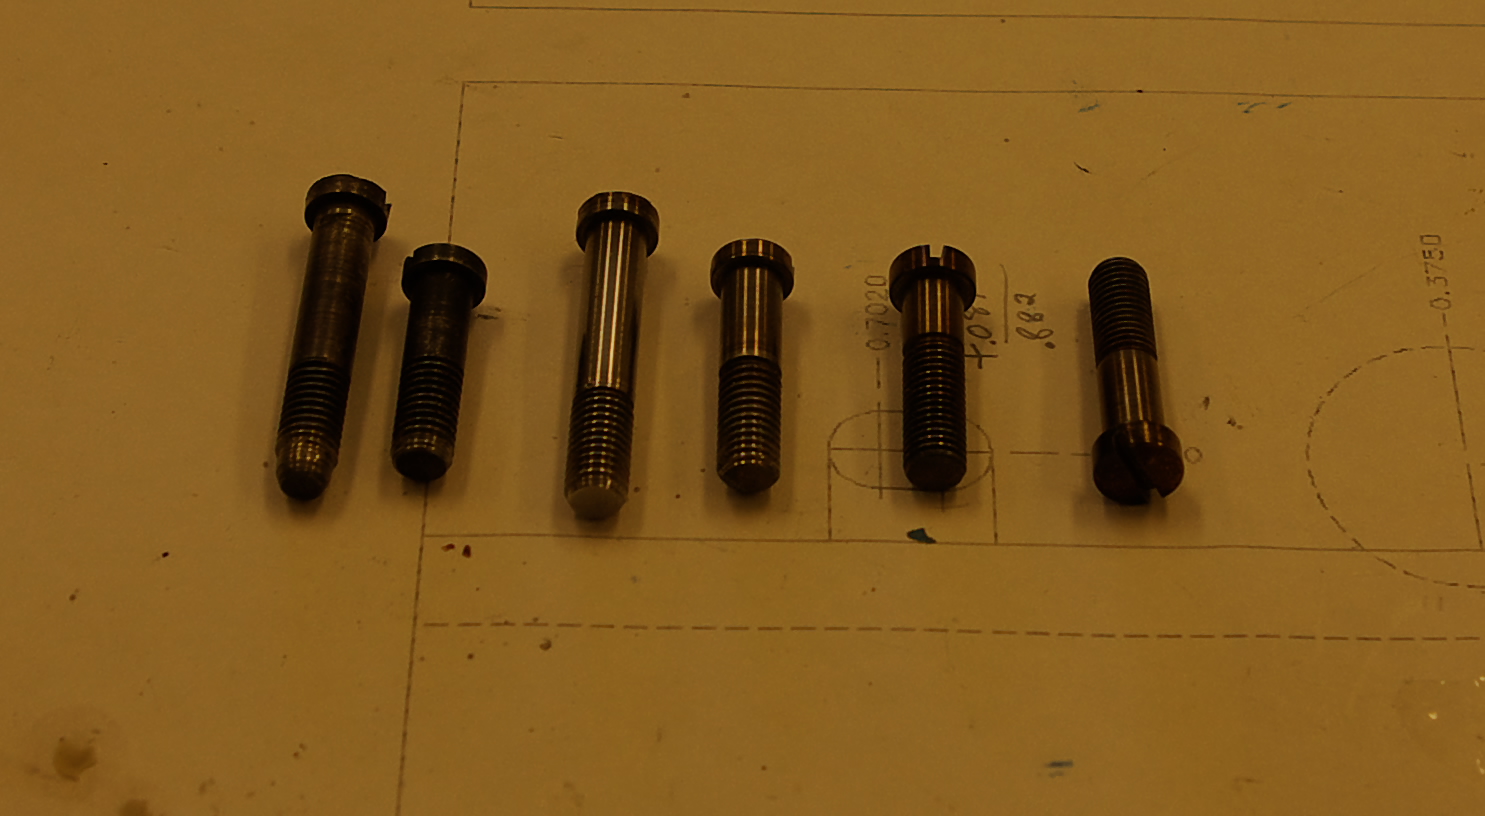
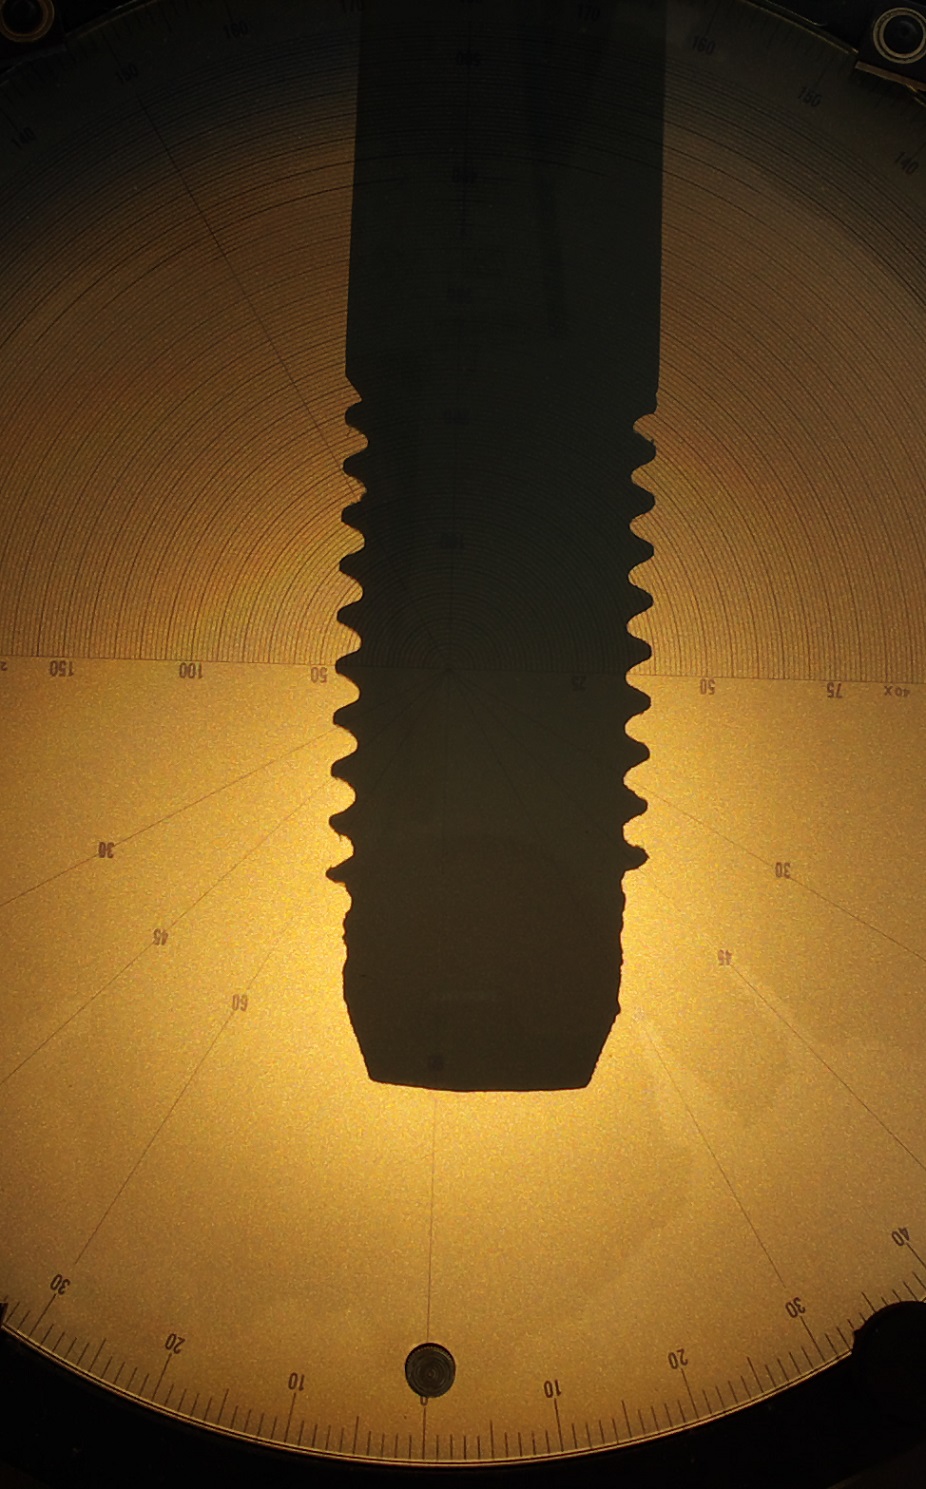
Making the pillars involves cutting the 4 1/2 degree angle on the front one, the 5 degree angle on the back one. I engraved a line on each after milling the angles then transfered a matching scribed line to opposite side to line them up. The transferred lines have to be lined up as the pillars are tightened down. The distance between the screw heads has to be set before the assembly can be epoxied into the stock. A lot of thought went into the process and I still got it wrong and had to mill the rear trigger guard hole a little off center to make things fit.
Hopefully this information will be helpful to members that have access to a lathe and mill. If you do not, maybe your favorite gunsmith can use it to become a better Krag smith.
I will be glad to answer any questions if I can remember the answers. (insert smiley here)
I do have 2 of the angles and may never need to use one again, if you are your favorite Kragsmith needs one let me know.ImageImage

Post Reply